Step 1: Open the Campaign Creation Area
- Navigate to the Ad Campaigns section of the platform.
- Click Create Campaign.
- Review the available setup options:
Smart Setups
Prebuilt templates created by Head Office or saved within your workspace.
Advanced Setup
Build a fully customised campaign from scratch.
- Select Advanced Setup.
Step 2: Choose the Campaign Type
Select the campaign type that matches your advertising goal.
Listing Campaign
Promote property listings to buyers or renters.
Brand and Recruitment Campaign
Promote your business, attract sellers, or recruit agents.
Brand Market Campaign
Increase brand awareness within your local market.
For this workflow, select Listing Campaign.
Step 3: Select the Listing and Campaign Objective
- Select the listing you want to advertise.
- Use the listing status filter if required:
- On Market
- Sold
- All
- Select the campaign objective:
- Traffic: drive visitors to a website or listing page.
- Reach: maximize the number of people who see the ad.
- Leads: collect leads through a Facebook lead form.
- Post Engagement: boost engagement on existing Facebook or Instagram posts.
- For a standard listing campaign, choose Reach.
Step 4: Name the Campaign and Set the Budget
- Review the campaign name.
- The campaign name will usually auto-populate using the listing address.
- Assign a campaign owner if required for internal reporting.
- Set the campaign duration and total budget.
Example:
- Duration: 14 days
- Budget: $400 total
- Select the spend category.
- Example: Vendor Paid
- Choose the payment method:
- Default payment method
- Alternative saved payment method
- Invoice to user (if enabled)
- Review and apply any available ad credits if appropriate.
- Click Next.
Step 5: Split Budget Between Meta and Google
Choose where the campaign will run:
- Meta only
- Google only
- Both Meta and Google
If running across both platforms:
- Allocate the budget between Meta and Google.
- Use a balanced split where appropriate, such as 50/50.
- Avoid splitting small budgets too thinly, as the platform may warn that the allocation is too low to perform effectively.
Continue once the allocation is finalised.
Step 6: Configure Meta Targeting
Choose the Meta targeting method.
Smart Targeting
Allows Meta to optimise the audience automatically.
Location-Based Targeting
Targets users within a selected geographic radius.
If using local targeting:
- Set the target radius.
- Select the desired age range.
- Apply audience interests or behaviours using available templates.
Examples include:
- Luxury home buyers
- First home buyers
- Downsizers
- Relocating families
- Commercial audiences
If supported by your subscription, you can also add a Custom Audience from your CRM.
Note: Custom audience uploads may not be available on all plans, particularly base plans within franchise groups.
Step 7: Select the Facebook Page and Meta Creatives
- Select the Facebook page that will run the campaign.
- Agent campaigns should use the agent’s page where applicable.
- Otherwise, the office page may be selected by default.
- Review any available automation or template options that can automatically generate creative sizes.
- Select the creative formats to use:
- Feed
- Stories
- Reels
- If available, use professionally produced reels for stronger engagement and performance.
- If using Canva or template automation, allow the system to generate the required creative sizes automatically.
- If building the campaign manually, upload or select the required creative assets individually.
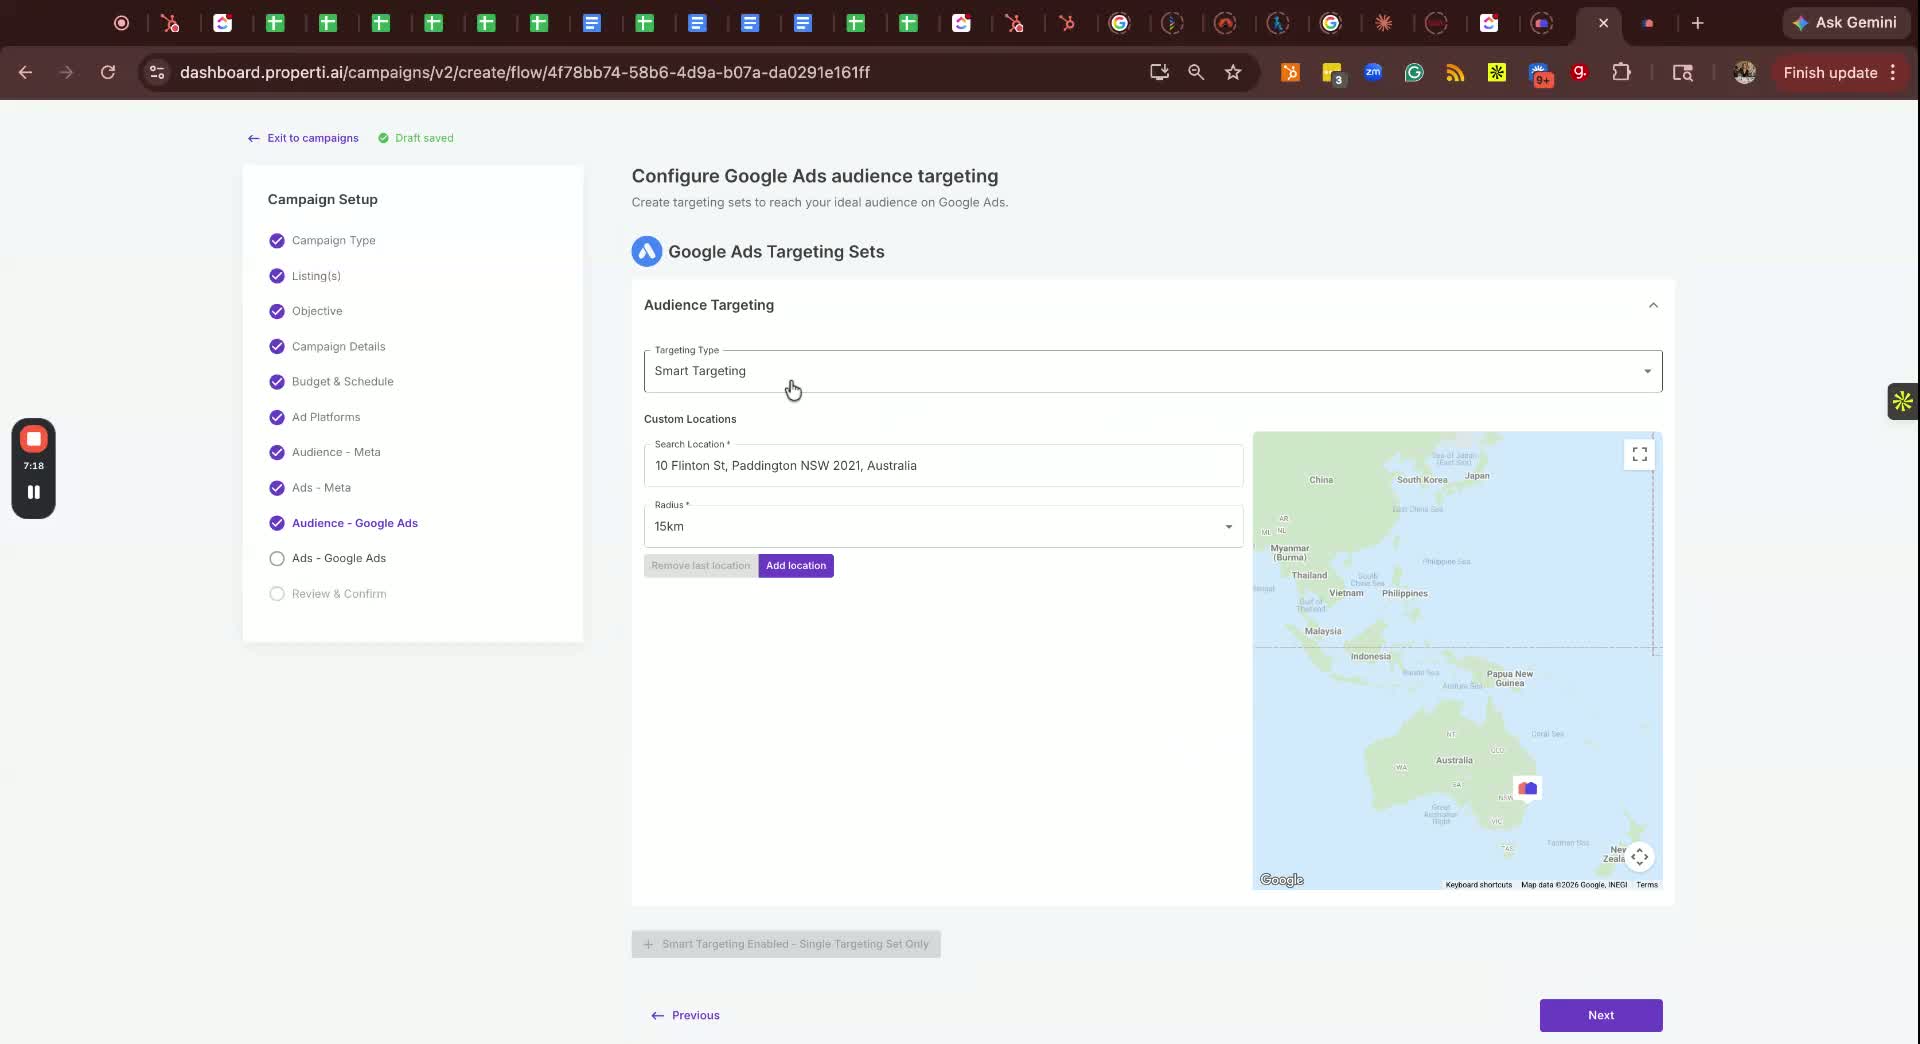
Step 8: Configure Google Ads Targeting and Creatives
- Move to the Google Ads section.
- Reuse existing creatives where appropriate.
- Configure targeting options as required:
- Radius targeting
- Smart targeting
- Demographic targeting
- Review demographic settings such as:
- Age range
- Household income targeting (if enabled)
- Interests and behaviours
- Continue to the creative selection stage.
Step 9: Select Google Creative Sizes
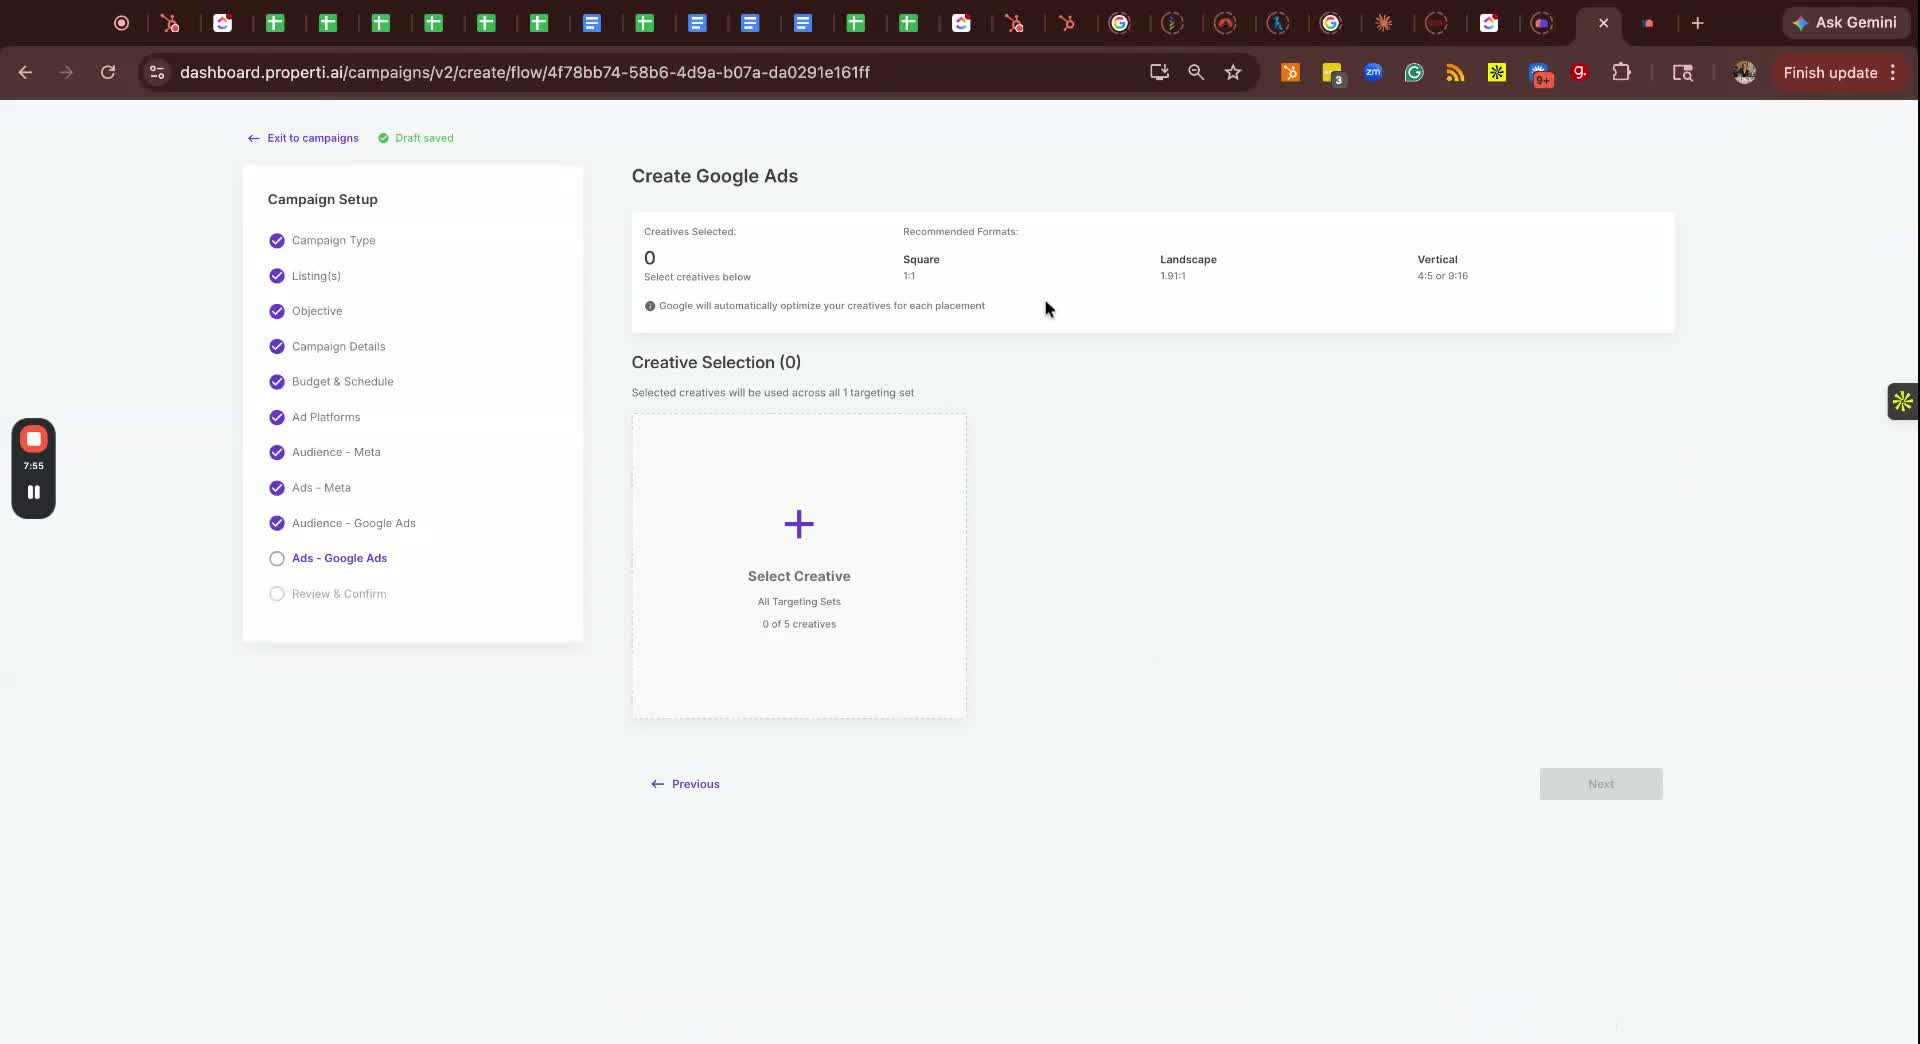
Choose the recommended creative formats:
- Square
- Landscape
- Vertical
Additional notes:
- Canva users and Head Office groups may already have these creative ratios prepared automatically.
- Independent Canva offices may need to create and upload these assets manually.
Before proceeding:
- Review all creatives carefully.
- Edit any assets if required.
- Upload reels manually if needed.
Click Next to continue.
Step 10: Review and Launch the Campaign
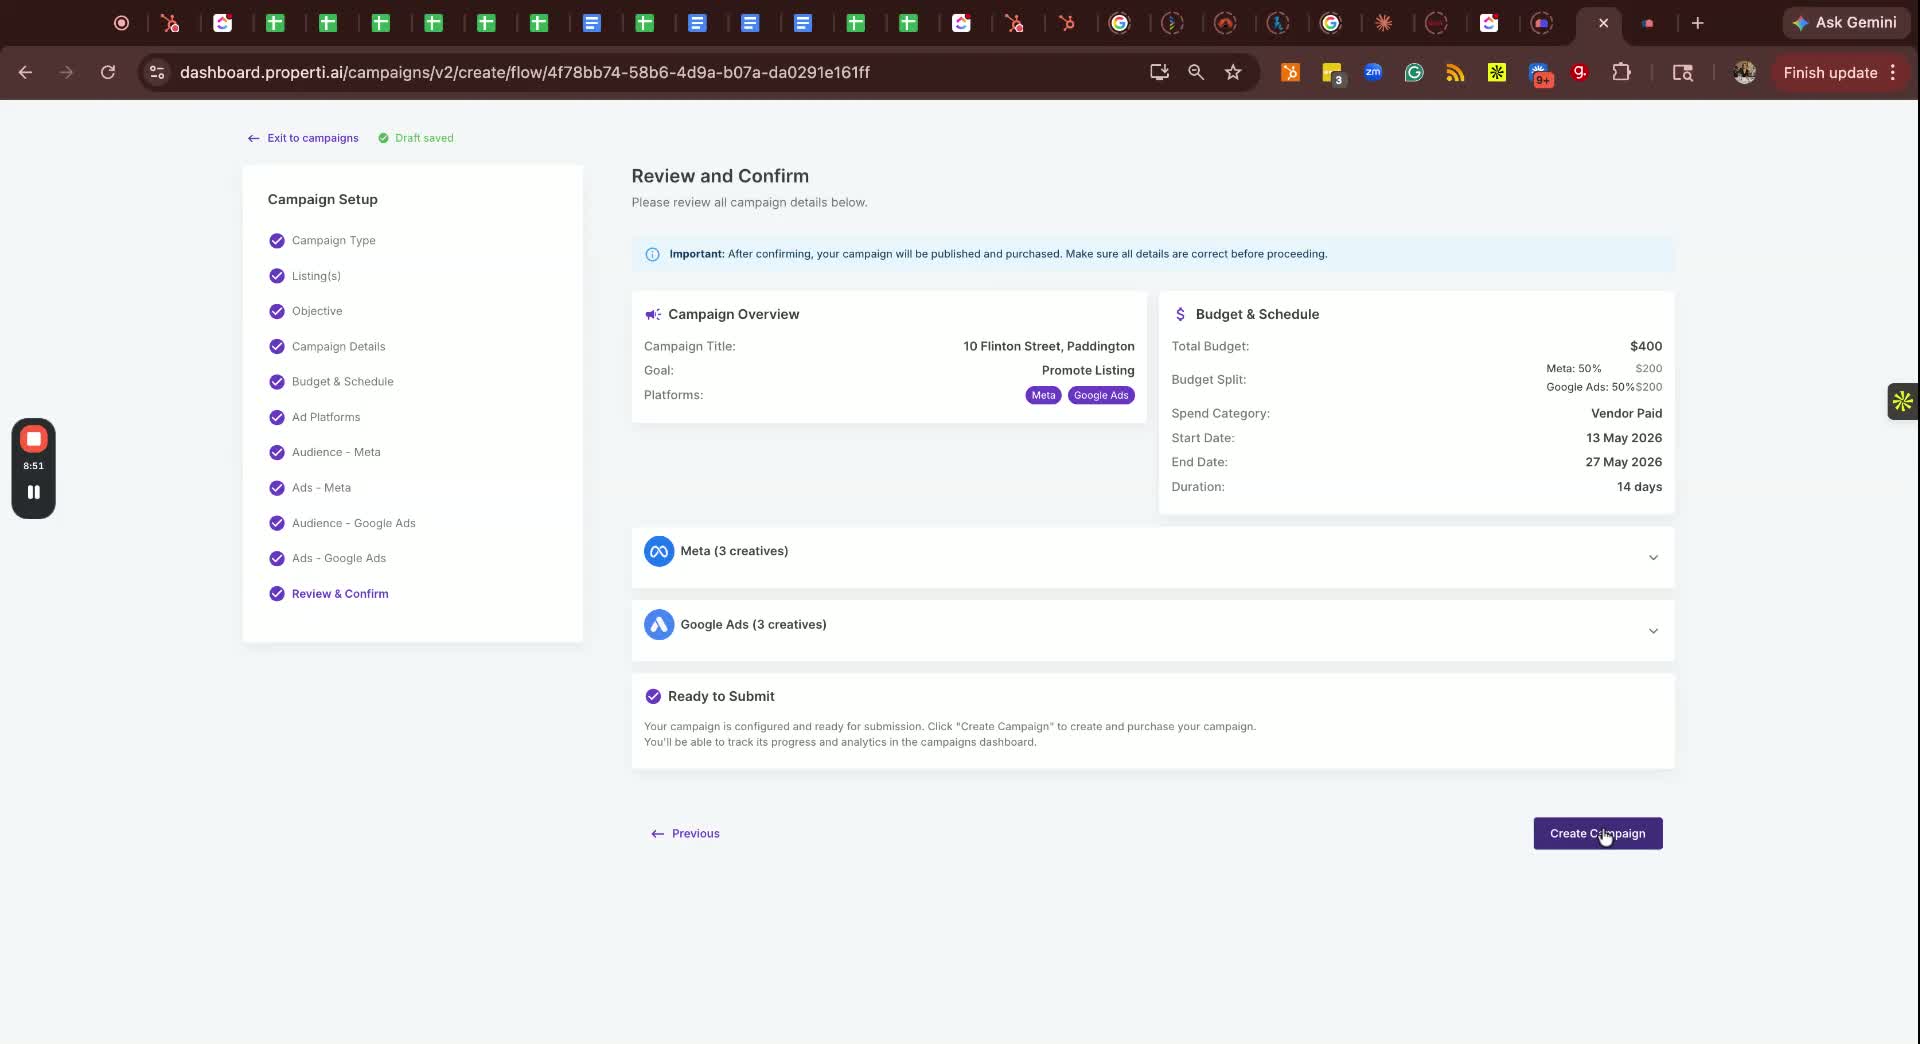
Before launching, review all campaign settings carefully:
- Campaign type
- Listing selected
- Campaign objective
- Budget allocation
- Audience targeting
- Creative assets
- Platform split
Once confirmed:
- Click Create Campaign.
- The campaign will begin processing and launch once approved.
Important Notes
- Avoid splitting small budgets too thinly across Meta and Google.
- Lead campaigns are generally recommended for users with more Meta advertising experience and larger budgets.
- Audience uploads may not be available on all subscription plans.
- Always confirm the correct Facebook page is selected before launching.
- Double-check the listing status filter to ensure the correct property is selected.
- Ensure all creatives use the correct sizes and orientations before finalising the campaign.
Best Practice Tips
- Use Smart Setups or templates where possible to reduce setup time.
- Use automation tools to generate creative sizes automatically.
- Start with Reach campaigns for standard property promotion before moving into advanced objectives.
- Reuse approved creatives across Meta and Google where suitable.
- Maintain a library of square, landscape, and vertical assets for faster campaign creation.
- Assign campaign owners for cleaner internal reporting and tracking when managing multiple campaigns.